02. Getting Started
Getting Started
To get started, navigate to the project workspace concept. Under
home/workspace/catkin-ws/src
, you will see the project SDK(
rll_sdk
) and planning(
rll_planning_project
) packages. You will be mainly working with the planning package where you’ll edit a launch file to change the object start/goal pose, and you'll edit a python script to code the path planning algorithm.
Python script:
path_planner.py
Let’s first take a look at the Python path planning script. Navigate to
/home/workspace/catkin_ws/src/rll_planning_project/scripts
and open the
path_planner.py
script. Here, you will find a sample solution where we first retrieve the input values, print them, call the
CheckPath
service and check if it’s possible to move directly from the start pose toward the goal pose. If it’s valid, the
Move
service is called to move the object linearly toward the goal pose.
Launch file:
planning_iface.launch
Moving on, let’s take a look at the launch file you'll need to modify. Navigate to
/home/workspace/catkin_ws/src/rll_planning_project/launch
and open
planning_iface.launch
. There’s a long list of parameters needed for the project. You’ll only need to edit the start 2D pose and goal 2D pose parameters.
Run the Sample Solution
It’s time to run the project with the sample solution. Enable the GPU, GO TO DESKTOP , and follow these steps for a successful run:
- Update/upgrade the system
apt-get update -y
apt-get upgrade -y```
2. Install all the packages dependencies
sh
cd /home/workspace/catkin_ws/
rosdep install --from-paths src --ignore-src -r -y
3. Build and source your `catkin_ws`
sh
cd /home/workspace/catkin_ws/
catkin_make
source devel/setup.bash
4. Launch all the project nodessh
We’ve combined all the launch files in a
start_project.sh
script.
Note: This script will only run if you are in the visual desktop, don't try to run it inside the workspace terminal!
cd /home/workspace/catkin_ws/src/rll_planning_project/scripts/
./start_project.sh
```
You'll need to repeat these steps after each reboot!
Stopping a Run
Hit Enter key in the main terminal to instantly kill the project execution and all the ROS nodes. You need to wait at least 30 seconds before starting a new run because the nodes will take some time to fully terminate. If you encountered an error, don't worry about it - just relaunch the nodes either manually or with the shell script file provided.
KUKASampleCode
Video Review
Look closely at the video and try to identify the 4 cycles mentioned earlier:
- First, the KUKA gripper will move to the object start position, orient itself with respect to the object, grab the object, and lift it up.
- At this stage, your path planning code will be executed. Your code will search for a path and navigate the robot through the maze by commanding 2D positions, and an orientation angle, in order to get around corners in the maze
- You will have a total time of 8 minutes to search for a path and move toward the goal pose. Once reached, your cuboid object will be placed in the goal pose.
- Finally, the robot will lift the object from the goal pose, return it back to the start pose, drop it, and get ready for another run.
Gazebo and Rviz
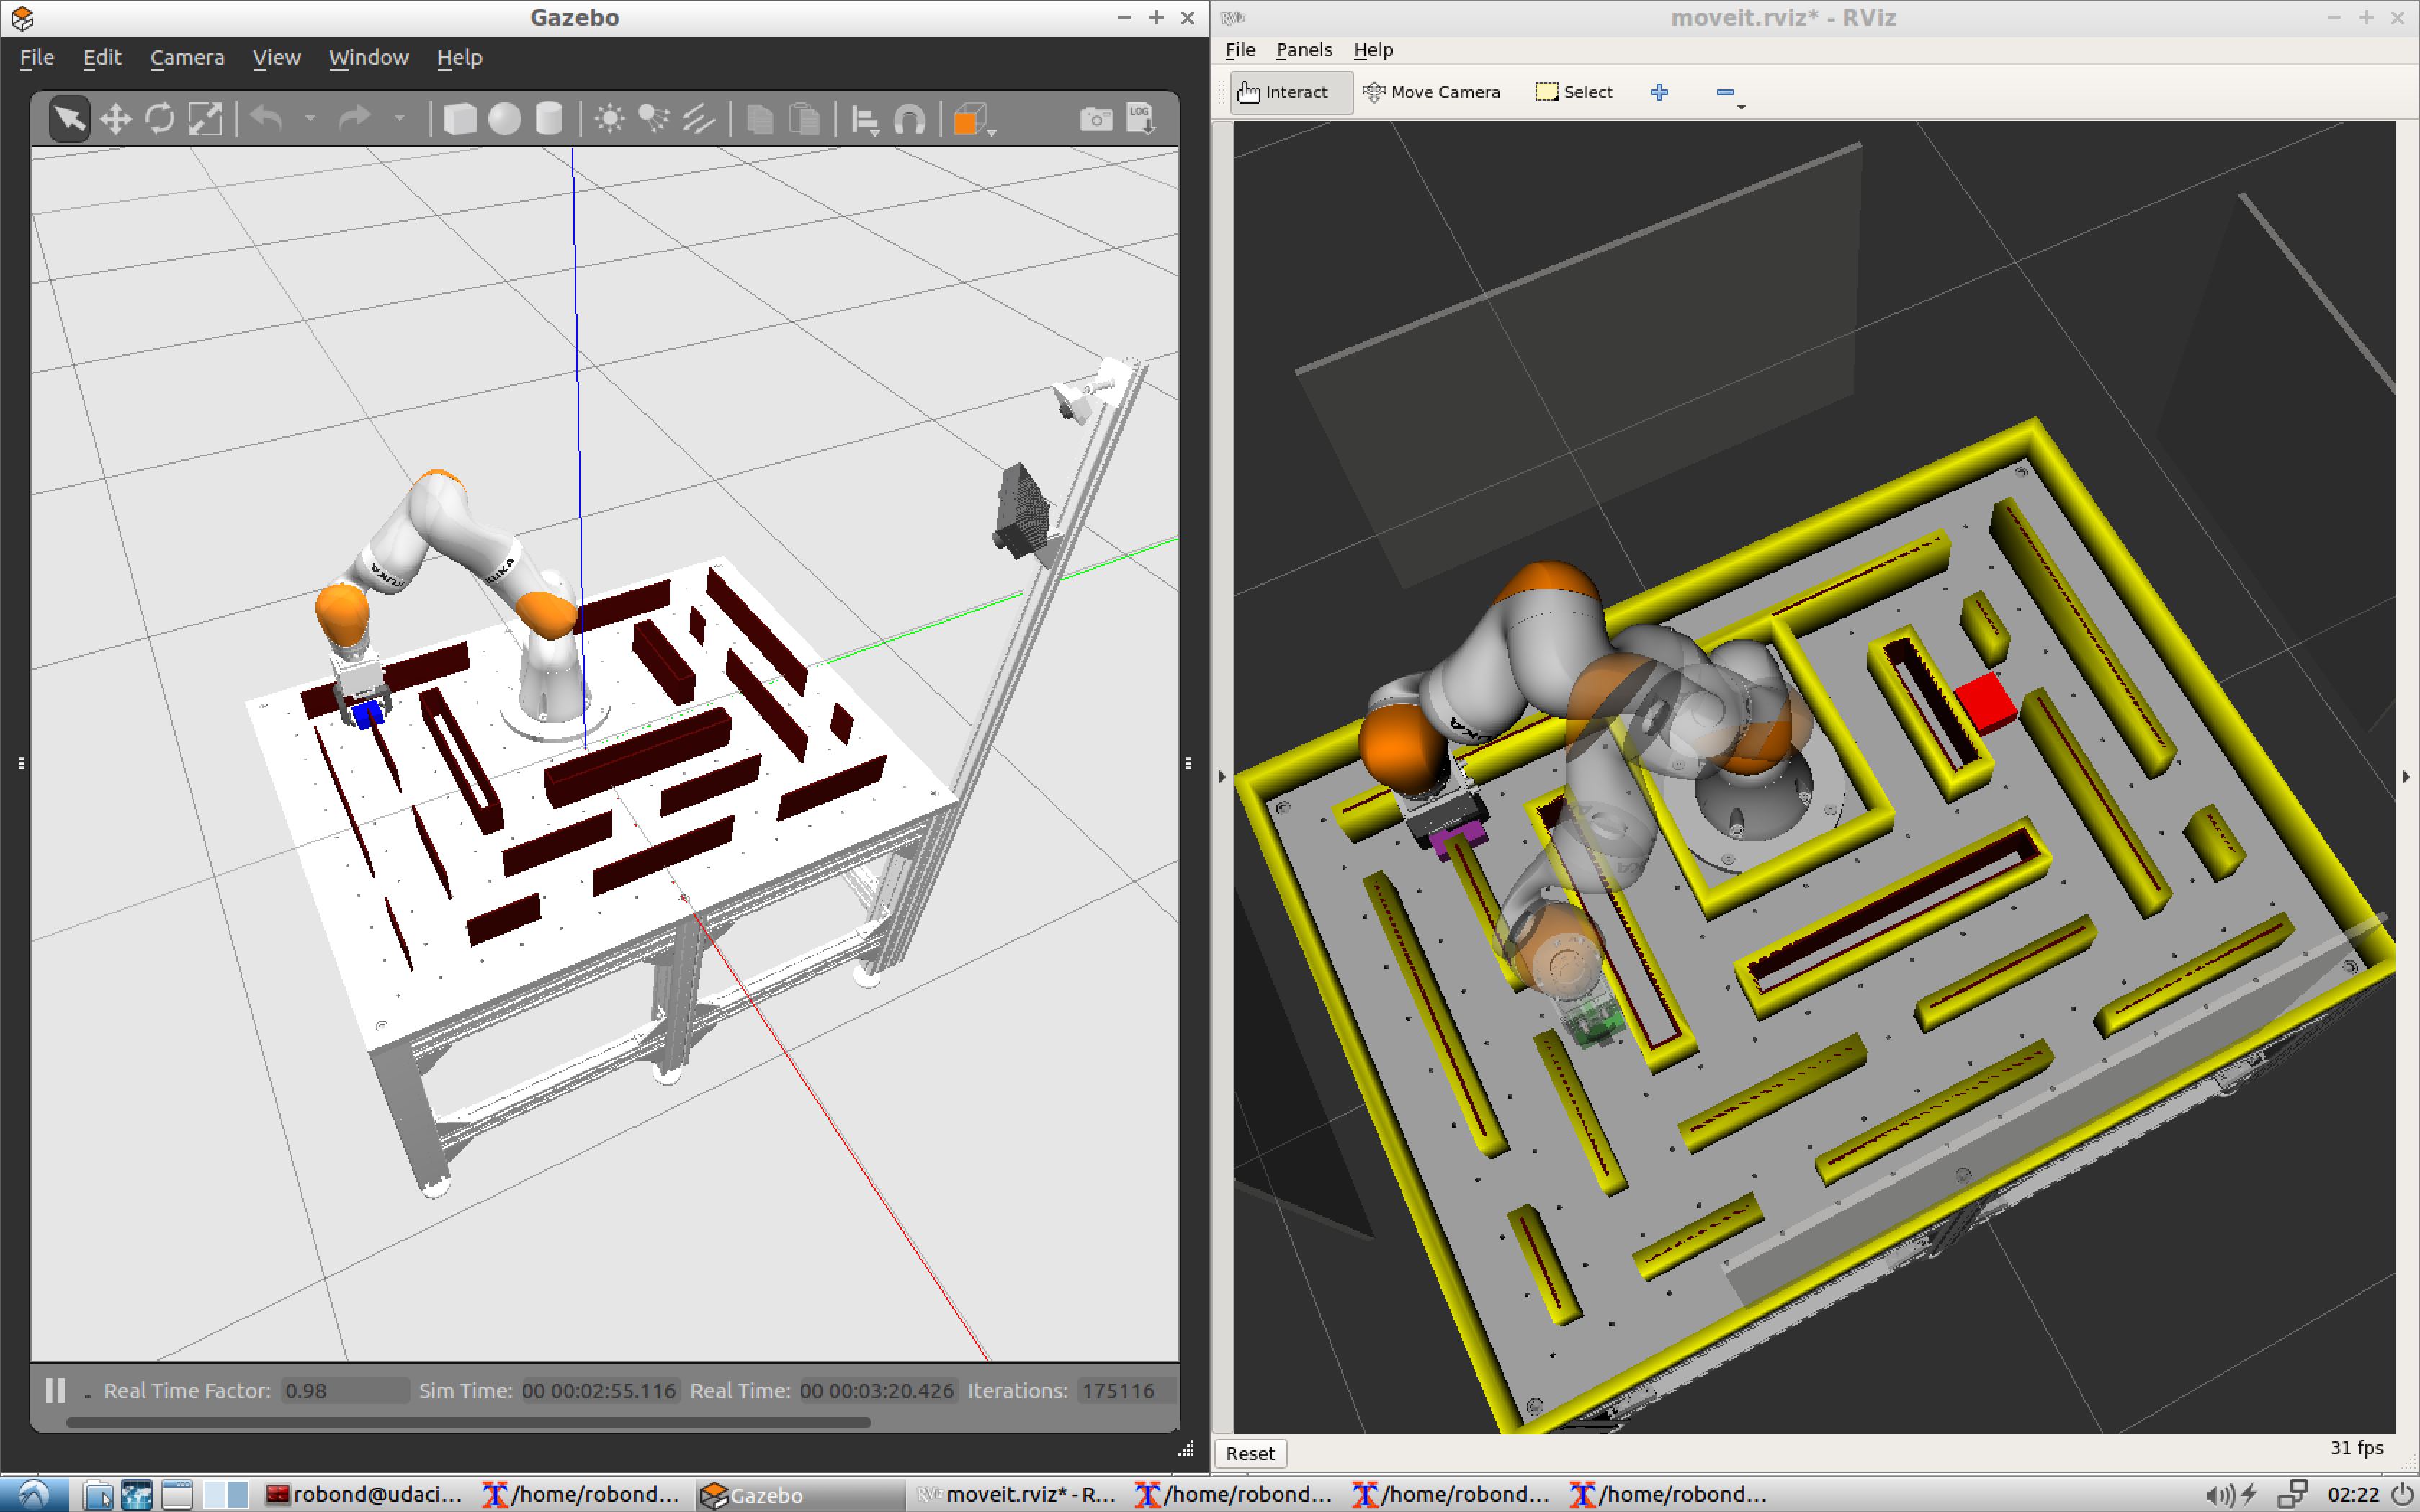
Gazebo : Visual maze(red color) which is a replica of the real maze located at the KIT Lab in Germany.
Rviz : Collision maze(yellow color) which is the same as the visual maze but with thicker walls and some extra ones. Inside the collision maze, you can still see the visual maze that has thinner walls. The red block indicates the goal pose of the object.
As a safety measure, we added a tolerance value to the visual maze to prevent any collision between the object or robot and the maze walls in the real world.